
I keep telling myself that springtime is just around the corner, but all the white stuff on the ground outside still has me shivering. While snow may still be falling, you can "spring forward" in your apartment with springtime decor. Give pretty pastels and florals a jump-start in your dwelling with this DIY mason jar makeover from guest contributor Rheney. It's as easy on the eyes as it is on your budget and do-it-yourself skill set.
__________________________________
Modern Mason Jar Makeovers
Guest Post by Rheney Williams
There are so many lovely things in life. Sweet-smelling candles that brighten your mood as they brighten the room; an ice cold glass of lemonade on a hot summer day; preserved fruit and vegetables picked at the peak of freshness and just waiting for you to open them up and sink your teeth in. And they all have one common thread connecting them together: Mason jars!
But long gone are the days where you have to settle for your grandma's jars.
No, I don't mean that in the sense that if sweet granny were to offer you the jars in which she lovingly stored her State Fair Blue Ribbon-winning stewed tomatoes every year for half a century you should turn her down, because I'm sure we can all agree that those 'grandma's jars' would be priceless!
What I mean to say is that there are so many unique ways to 'work' the Mason jar, and the classic clear is receiving a run for its money as the most popular look for these more modern Masons. And now that the holidays are over, my windowsills need a new look, as well. That's why I'm thinking a modern Mason jar makeover is in order.
Here's how I created my colorful collection. Hopefully it will inspire some out-of-the-crayon box concepts for your own home décor!
Getting More out of your Mason Jars!
I had some pint-sized Mason jars on hand to work with, but before you start to worry about the cost of this project, don't! You can pick up a dozen of them for around $10-$12 from the grocery store. That's right at or slightly less than $1 each! In addition to the jars, you'll need paint and rubbing alcohol.
You need to remove all traces of oils or grease to make sure the paint will adhere to the jars, so start by removing the lids and wiping down the inside of the jars with the rubbing alcohol.
*Tip: By painting the inside of the jars, you can protect the paint from chipping or getting scratched and scuffed the way it might if you painted the outside.
After the alcohol has evaporated, the jars are ready to paint.
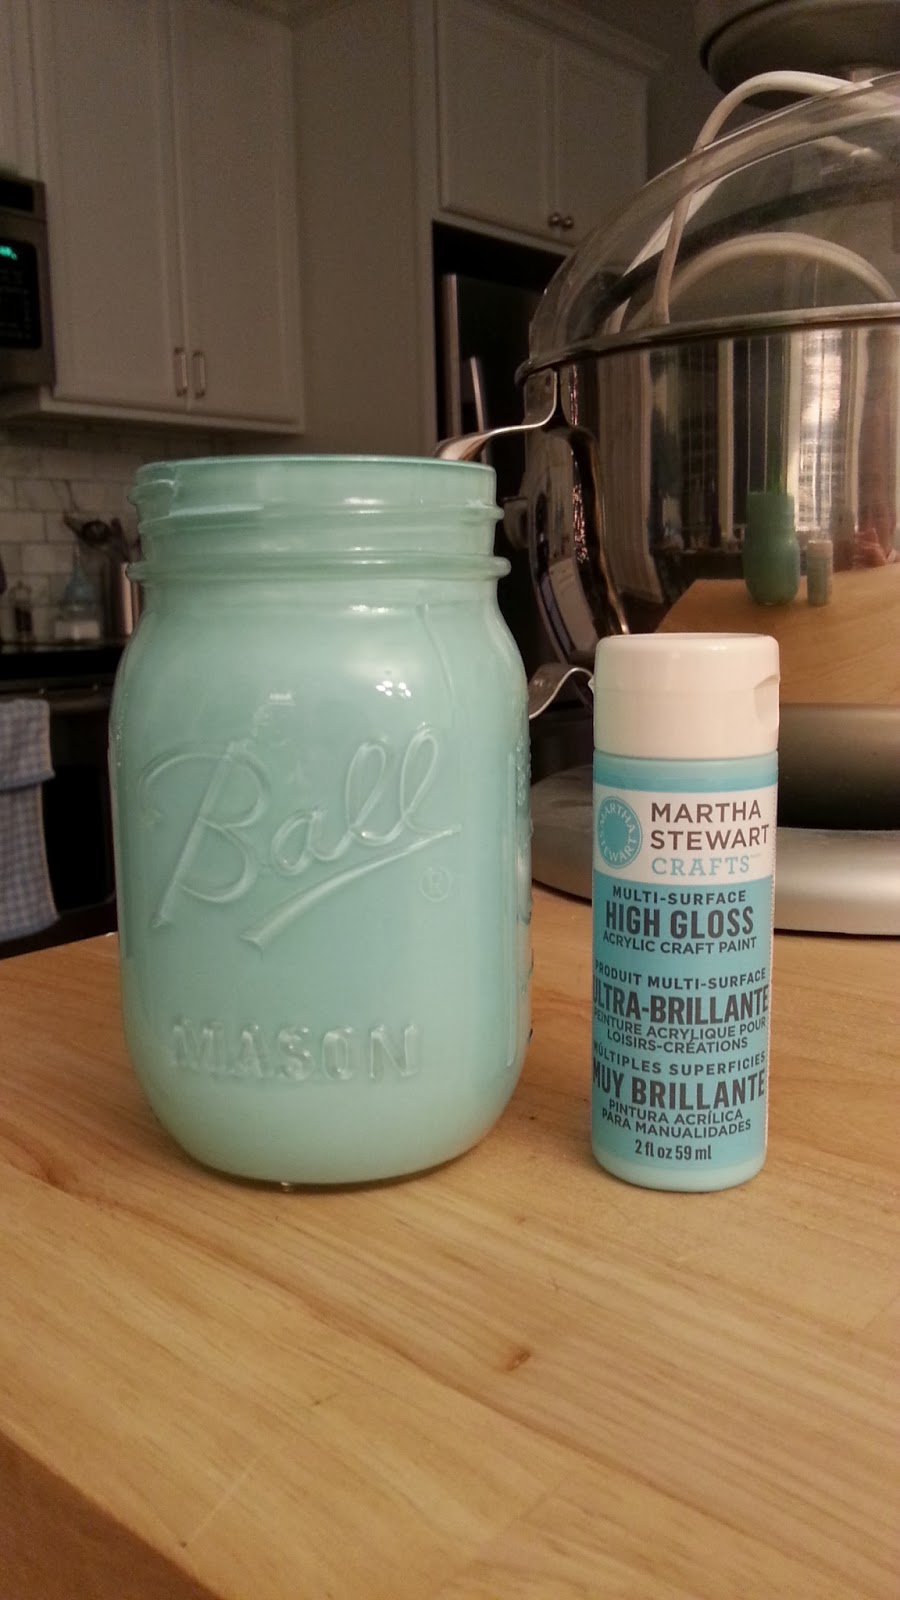
When it comes to painting the inside of jars or bottles of any kind, there are several different methods but the most popular is the 'pour and tilt' method, wherein you pour some paint into the container and tilt it on its side and swirl it around before turning it upside down to allow the paint to coat the entire inside. This works great when you're using a latex or especially thin consistency paint, but if you're using acrylic craft paint, I find that it's too thick to swirl around the jar in any sort of cost-effective or efficient way.
For that, I turn to my trusty friend textile medium. By adding a squirt of textile medium (also called 'fabric medium') to the dollop of paint at the bottom of the jar (yes, both highly technical terms for very precise measurements!), it becomes workable to the point that I can simply 'pour and shake' my way to a fully coated inside.
So, squeeze a generous amount of paint into the jar and a slightly less than equal amount of textile medium, replace the lid to seal the jar and shake it (like a Polaroid picture, optional). Make sure to turn and twist the jar while you shake so that the entire inside is coated. Carefully remove the lid and pour out the excess paint before turning the jar upside down to drip-dry.
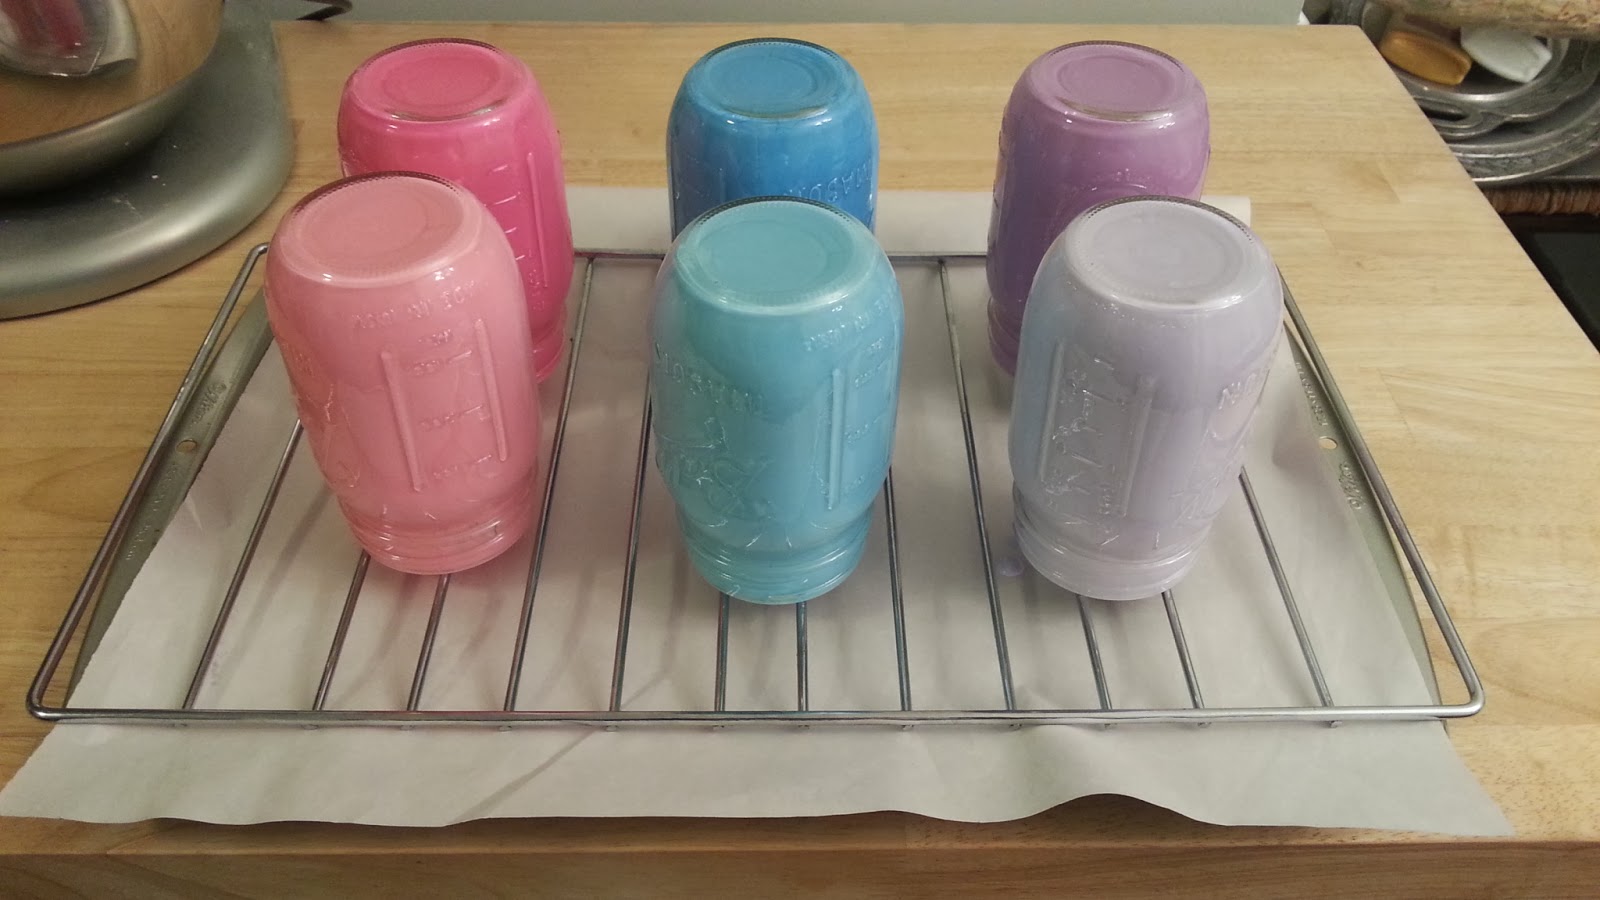
I placed craft paper on a baking sheet and set the jars on top of a cooling rack. The next morning, I removed the jars, wiped the random paint spots off of the rack and tossed out the paper with the paint drips. Done and done!
Now, simply wait until the inside of the jar is dry enough for whatever purpose you've intended (at least a few days). Here are a few ways I used mine!
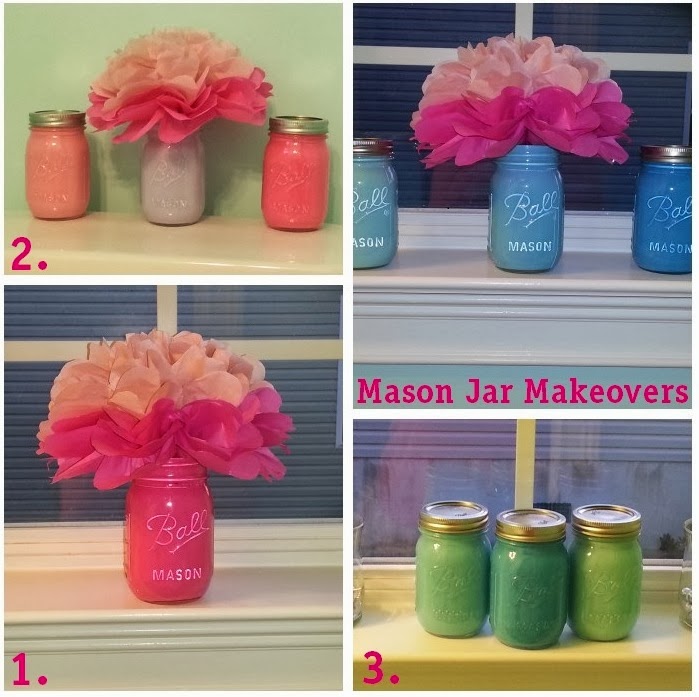
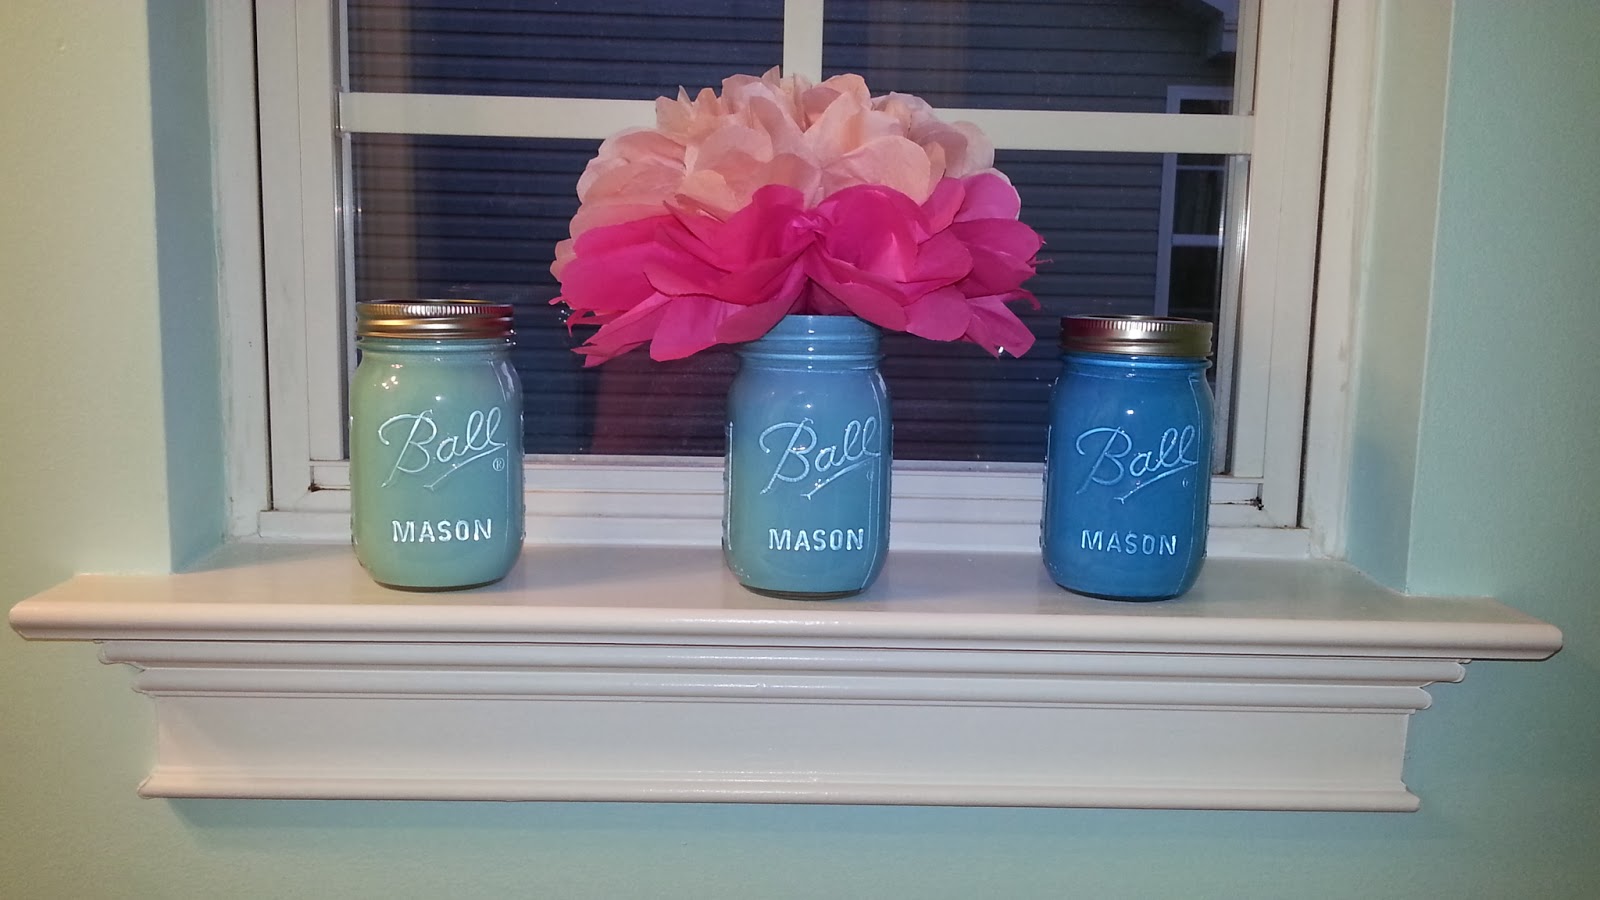
Make sure if you're using this as a real vase with water that you seal the inside of the jar first. Otherwise, it makes a lovely vase for my tissue paper flower (1). Talk about color coordinating your casement windows!
These Mason jars work great as bathroom accessories and can serve as storage for items like cotton swabs, hair bands or even as a toothbrush holder.
Personally, I like how they look dressing up the top of the toilet tank (2). Such a good way to add color to the room using a far-too-often underutilized space!
And finally, you can't go wrong with a little color by candlelight to make your windowsills feel like home(3)!
What colors and uses are you thinking for your modern Mason jar makeovers?
__________________________________
Rheney Williams enjoys sharing her DIY paint crafting experiences with others and writes about her windows craft projects for The Home Depot. Her craft décor interests frequently center on projects that parents can create with their kids. To visit Home Depot's windows page, click here.
Thanks for the lovely DIY project, Rheney!

Comments