
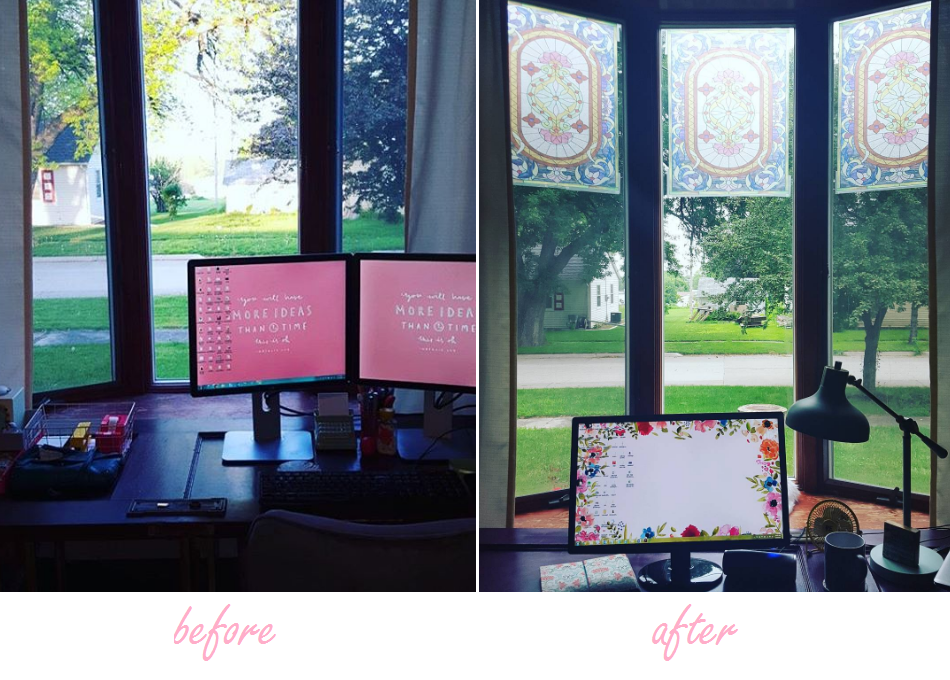
In my office, my desk sits in front of a nice bay window that faces east and looks out over the neighborhood. For six hours of the workday, I love it. But from 8 AM to around 10 AM, the sun is in a position high enough to peek over the trees, but not so high that it's over the house. So it's a really bright, sunny spot to sit in the morning—sometimes it's hard to even see my computer screen. (Now I know why the previous dwellers had a strange window blind that only went halfway down. I took that down a long time ago.)
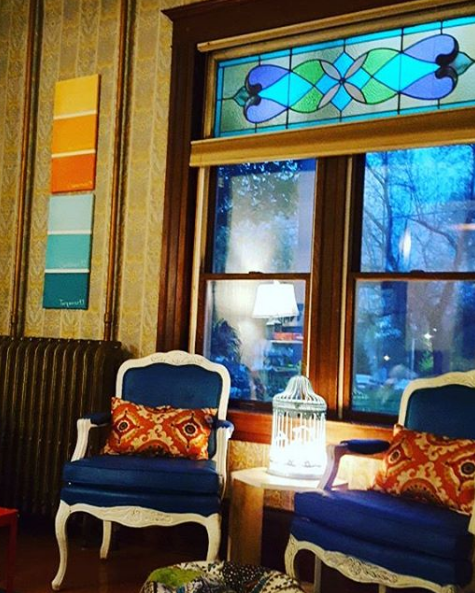
So I've been brainstorming ideas to tame the morning sunlight a bit—without blocking up my window with blinds. I found myself inspired by the real, original-to-the-house stained glass window in our living room. It looks like this:
So I got to thinking: Wouldn't it be nice if the upper third or fourth of my bay window had stained glass, too? I scavenged around on the internet to see if that was such a thing.
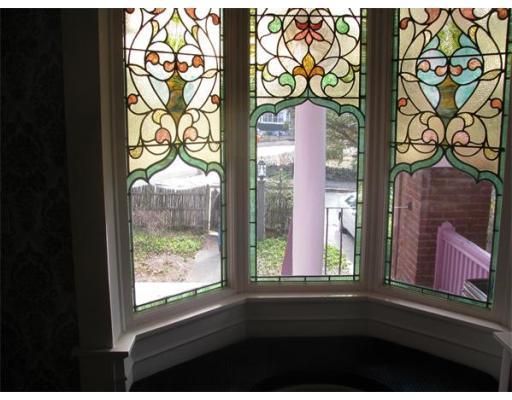
And I got inspired by bay windows like these:

Inspired and feeling ambitious, I took to Amazon.
There are a lot of stained glass window clings out there. Some are sticky, some hang thanks to static or a fine mist of water. Some are modern and contemporary, others give off more baroque and Victorian vibes. Lucky me, I found a design that I felt fit with both the stained glass window in the attached living room and the color scheme and decor in my office.
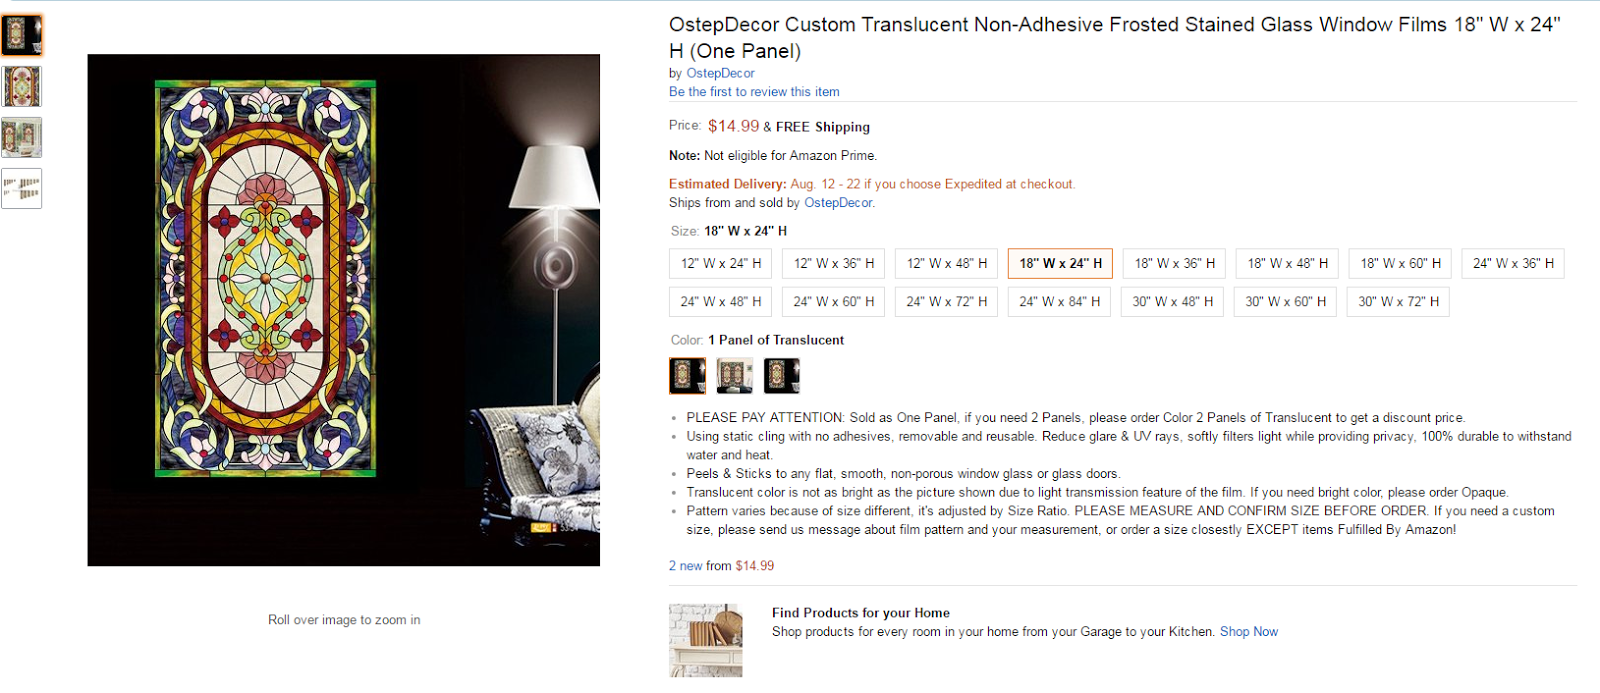
I measured my windows and compared my measurements to the available window film dimensions. I toyed around with the idea of doing one design on two outer windows, and a different design in the middle. But ultimately, I ordered three of the same window films for about $40.
The shipping took a while (mine shipped from China). They arrived in a tube—kinda like the ones that hold wrapping paper.
Here's how application went:
First, I unrolled the three films and put them on a clean, flat surface. Then, I placed a clean piece of poster board on top. On top of that, I put some books. I did this to flatten the films. While they flattened, I cleaned the windows with Windex and coffee filters.
Once the films were flattened, I climbed up into the window and held a film up to see how it would look and how I wanted to place it. I knew it'd be just a bit small width-wise. (I preferred slightly small to needing to cut a larger film down and lose out on the design.)
First, I tried to attach the film with good old static. It didn't work. Unfortunately, the films didn't come with instructions—and the online listing wasn't much help either. So I had to wing it. Next, I followed some online directions and sprayed water on the window. I applied the film (smooth side to the glass), smoothed it over the glass, worked out any bubbled and wrinkles with a debit card, and wiped up any excess water with a paper towel. I stepped back and watched in horror and frustration as the corners started to roll back.
At this point, I was starting to get frustrated—balancing on a step stool, standing in the hot sun, and watching my films fall down. Ugh. So I reached for the tape. All I had on hand was some frosty, not-too-see-through tape. I taped the corners first, then eventually resorted to taping along the tops and bottoms of the film. It stayed! Granted, the frosted tape didn't look so great. But I could always (and definitely will) be replacing it with crystal-clear tape.
Here's how they look:
Really, I swear I'm going to get some clear tape instead. ;) So try to ignore that eyesore part of it.
Now, if I had been buying these clings to perfectly fit into a window... I think it would have been easier. If the clings had to be cut down to the perfect size and would be held in place by the window trim, I think they would have attached with either static or water... no tape needed. But covering the entire window wasn't what I wanted, so this is what I got.
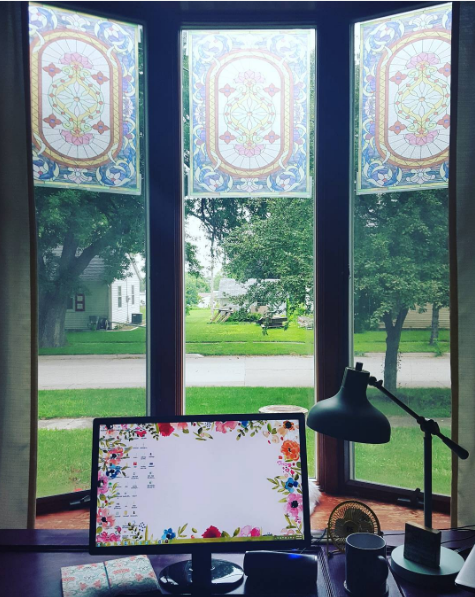
The film definitely helps to diffuse some of the sunlight in the morning, though I still have to pull my curtains closed for those first couple hours. The colors aren't vibrant all day long—they're most bold and saturated when it's really sunny out.
I'm happy with how they look in my office, but I'm super stoked about how they look from outside!
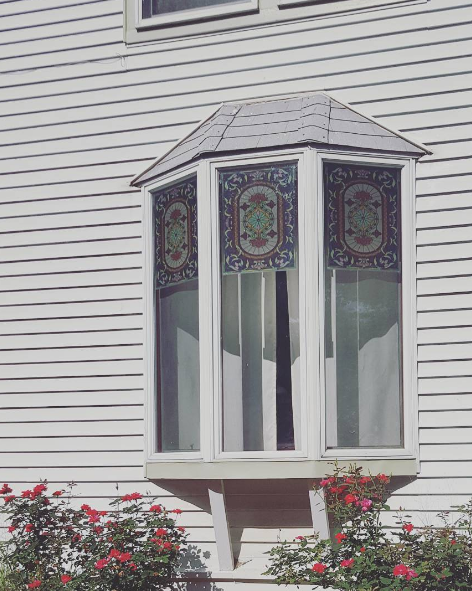
The tape is much less noticeable from outside—and the stained glass design really lends itself to the century-old exterior. Just because of how it looks out here, I'm thinking I might have to do a few more windows. I have yet to step outside and see how looks at night when the house is lit up—I imagine it's really pretty!
Interested in this for your home? Here's where I bought my stained glass window panels.
P.S. This isn't a sponsored post. I wasn't compensated. I just love my stained glass window panels and have had so many people ask about them, I thought I'd share my review (adoration, frustration, and all) here on the blog. :)
Comments