
The Lovely Side partnered with DecoratorsBest for this project post.
All thoughts and opinions are 100% my own.
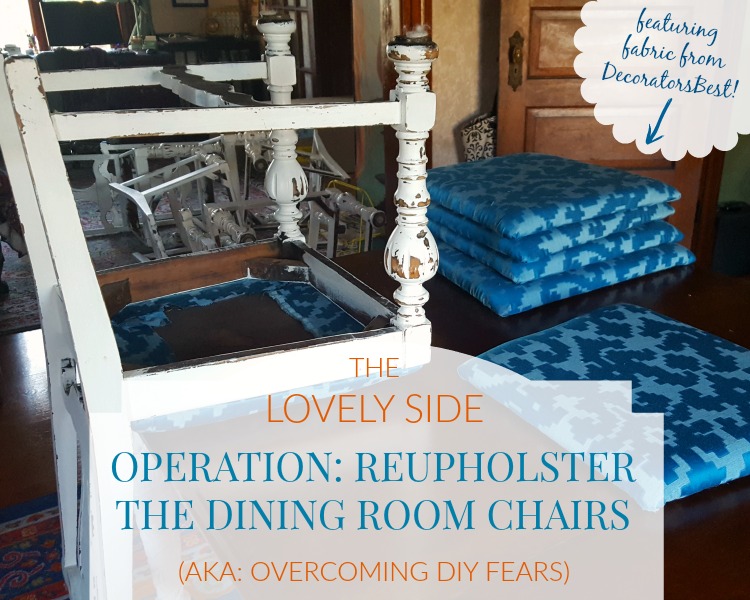
The blog hasn't been super busy lately—and for that, my lovelies, I apologize. But we have been busy here in our old house. Peeling wallpaper. Repairing plaster walls. And taking on first-time DIY projects, like this one. I reupholstered my dining room chairs!
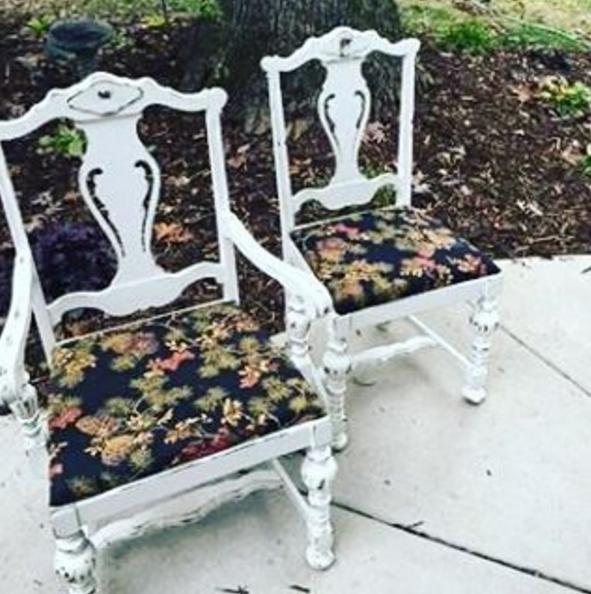
If you follow me on Instagram, you may have heard that I finally found some dining chairs for our beautiful farmhouse table. I was really struggling with finding the right chairs—debating between buying metal industrial chairs, tracking down some antique chairs, or just ordering something plain to "get by." Dining chairs (especially needing six) really adds up. But my patience paid off and I scored a set of six chairs on Craigslist for $200. They're antique and the couple had DIY'ed them with some chippy white paint and new cushions/seats. Five armless and one captain's. They're pretty much perfect and I adore them.
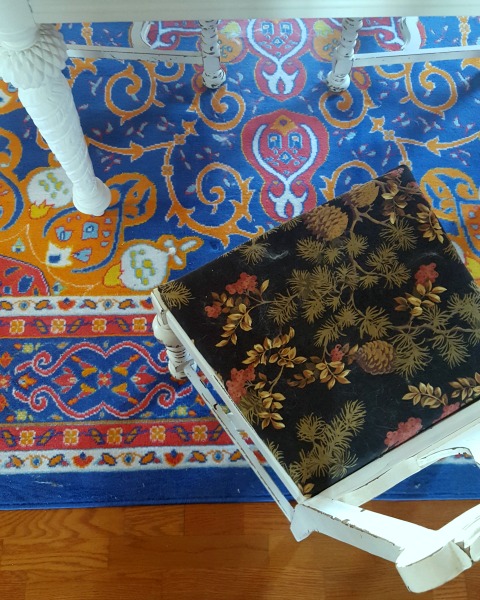
But when I brought them into our dining room, I started rethinking everything. Here I'd bought this fabulous orange and blue "magic carpet" rug and the chair cushions clashed sooo bad. But I also kinda like the chair cushions. The black was nice with the white chairs and farmhouse table. It got me thinking about potentially switching up the decor scheme I'd planned—maybe going with black and white and neutrals, more of a rustic farmhouse feel, and moving the bright rug into the living room.
Maybe you're wondering, "Why wouldn't you just jump at the chance to reupholster the dining chair cushions?" Well, honestly... I was scared.
I'd never reupholstered anything. In fact, I don't do a lot of projects with fabric—period. So was apprehensive to say the least. I was literally looking at new rugs online when I heard from DecoratorsBest asking if I'd like some Robert Allen fabric to use for a project and review in a blog post.
Lovelies, I took it as a sign. A sign that there was some fabulous fabric waiting for me at DecoratorsBest. A sign that it was time for me to stop be a DIY-scaredy-cat and get back to being adventurous with my projects. So I said, "Yes."
If you're not familiar, DecoratorsBest is an online source for discounted fabric and wallpaper—the best brands, latest trends, and highest quality all for great prices. They also sell other decor essentials, like rugs, pillows, and poufs. Check out their lookbooks for a dose of visual inspiration.
I spent a good hour pouring over the Robert Allen fabrics at DecoratorsBest. I wasn't sure where to start. I know that upholstery fabric needs to be heavier and higher quality fabric so that it will hold up to being sat on and used on a daily basis. But there's where my knowledge ran out. Luckily, DecoratorsBest made it easy with their online upholstery guide. Plus, I could search specifically for upholstery fabric—and sort by things like color, pattern, brand, and designer.
Browsing all the fabrics was too much fun—and I bookmarked several fabrics for future projects.
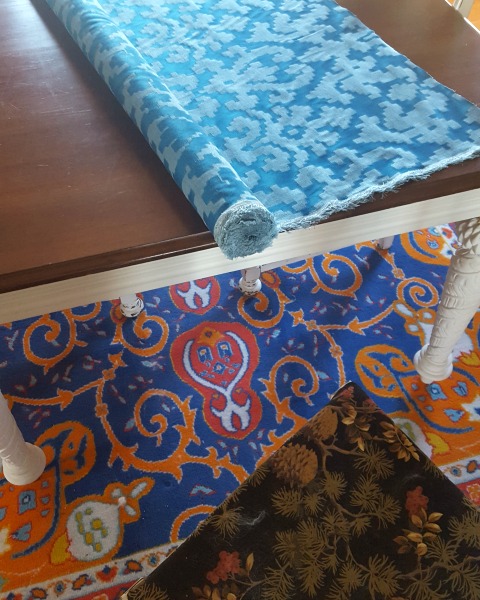
Eventually, I narrowed it down to several orange and blue designs that I liked, but ultimately settled on Robert Allen Puzzle Play Calypso Blue fabric because 1) the shade of blue fell in between the cobalt and teal blues in my rug—meaning, it would probably match even if it wasn't perfect, 2) the pattern was just enough that it wouldn't overwhelm or pale in comparison to my rug, and 3) the pattern was also a forgiving one that would require me to carefully line up stripes or anything.
The fabric shipped super fast and—oh my goodness—is it every gorgeous. I couldn't help but imagine how lovely it'd be turned into a 19th century ballgown or something. The blue is vibrant and the fabric feels so nice to the touch—strong but soft. Seriously so lovely. (Okay, I'll stop gushing now.)
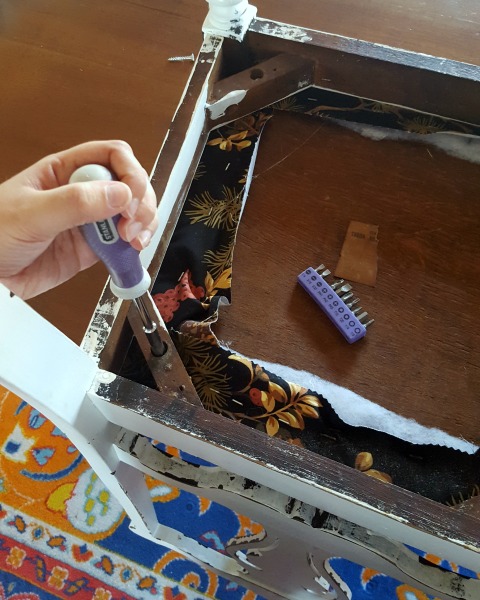
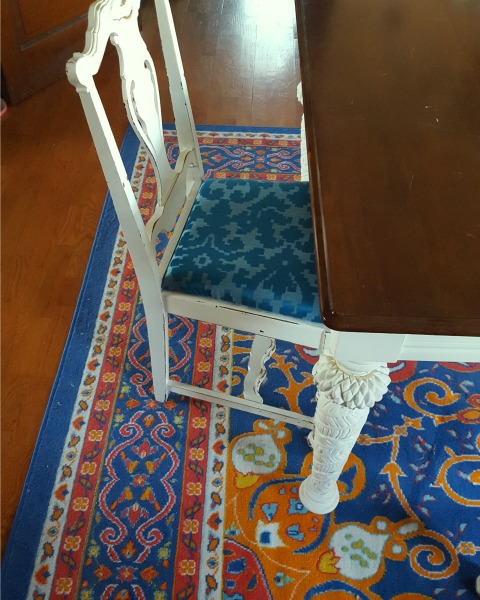
Since the previous chairs owners had done a decent job of reupholstering the chair seats, I decided to just reupholster over their fabric/cushion. I did this because it'd be easier and because maybe someday I'll want to go back to the black. That's a big maybe though. (I'm really smitten with this blue.) Be careful if you choose to go this route though. My blue fabric is thick enough that the pattern underneath wouldn't show through. But a lighter colored or lighter weight fabric might not give enough coverage.
First, I took the seats off the chairs. This was pretty simple—they were attached with four screws in each corner on the underside.
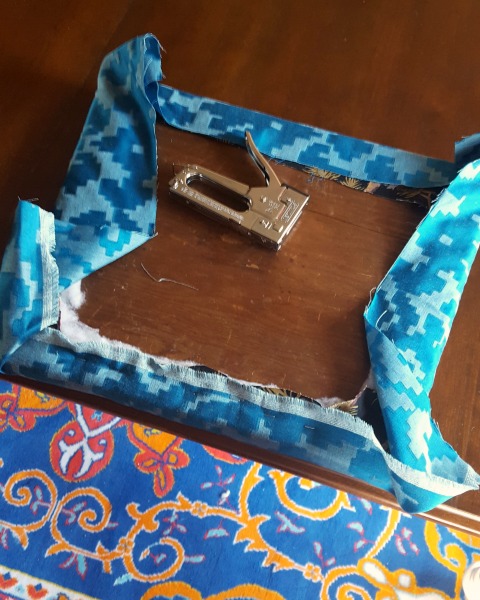
Next, I cut six rectangles of my blue fabric. I was a bit generous since this was my first time reupholstering. Then, the fun part! My bf loaned me his handy dandy staple gun. Again, I was a little leery. I imagined accidentally stapling my hand or something. But once he showed me how to use my weight to push down on the staple gun (rather than squeeze, which can cause unsteadiness), the stapler gun and I became BFFs. I'm already plotting other projects that I can involve this handy tool in. :)
I didn't follow a tutorial or anything. I laid the fabric down on the clean table, making sure the backside was against the seat. I put a few staples along one side, then pulled the fabric taut and put a few staples into that opposite side. Then I repeated with the two remaining sides, always making sure to pull the fabric tight and smooth out any wrinkles. The corners were the tricky part—I tried to take a "gift-wrapping" approach, but ended up just folding up the corners however I could to get it to look the best. I trimmed off excess fabric and stapled any loose bits.
(I really enjoyed stapling.)
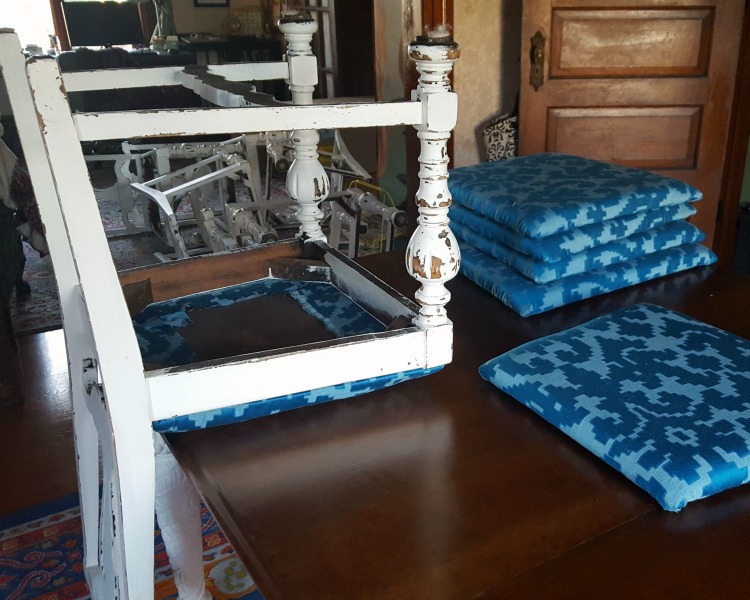
One cushion into this project, and I couldn't believe how afraid I'd been of reupholstering. Once I got the hang of pulling the fabric tight and stapling at the same time, I was hooked. I clipped right along—it was much easier and faster than I imagined. All in all, it took me a couple hours. (And that's with a little afternoon coffee break thrown in.)
I do have some fabric left over, too. I'm going to try to turn it into a runner or some place mats—but that's another project for another blog post.
When the cushions were finished, the bf helped me screw them back into the chairs. That was a two person job—I held the cushions centered in place, he used the drill to reattach them.
I flipped the first chair back over and fell in love with that blue fabric all over again. I mean, the black fabric underneath is nice. And I can see why I considered keeping it. But boy oh boy, this blue pattern is so much more... well, "me." It adds a dash of luxury that contrasts nicely with the chippy farmhouse chairs. The pattern is fancy, but the puzzle-like edges gives it a contemporary freshness. And the blue is just right. It helps the little bits of light blue in the rug pop.

Obvious, my empress-in-residence Cotton approves. No more had I put the third chair at the table when she jumped up for a seat—eager to cover my newly reupholstered cushions in her silky white fur. (Note to self: stock up on some more lint-rollers. These seats are too pretty to let get hairy.)
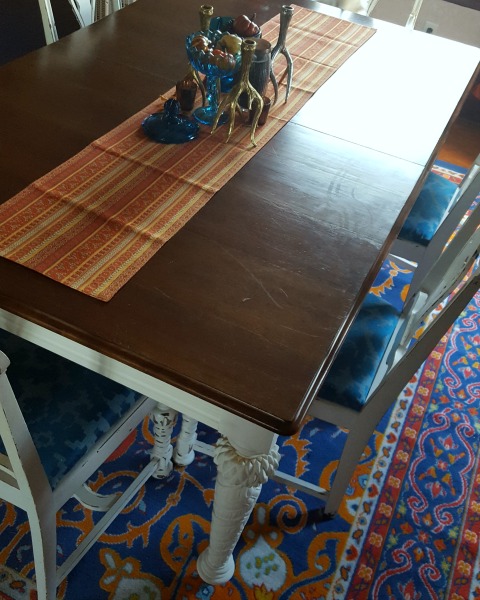
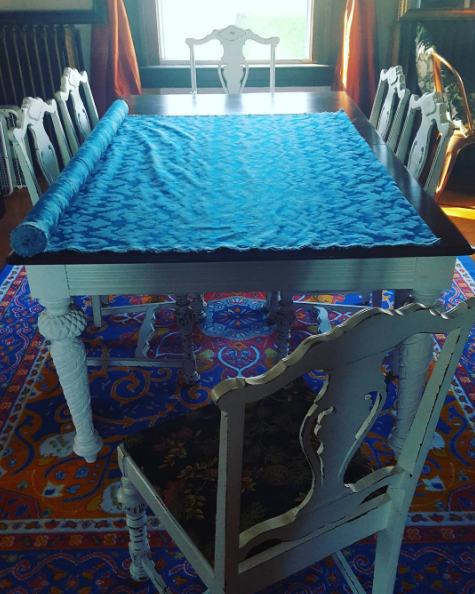
Here's the finished look. I scored the table and chairs separately on Craigslist, but aren't they a match made in decor heaven? And I love how the rug ties the chair cushions and table runner (yes, I know I need to iron that) all together. Next, we'll be stripping the wallpaper from this room and painting the walls. Maybe I'll match a paint swatch to these cushions? Or maybe I'll go with a crisp white to let the blue really steal the show? I guess we'll have to see.
Thanks to DecoratorsBest for providing me with this gorgeous blue fabric and inspiring my first reupholster project. I'm already looking for something else to reupholster! I was provided the fabric for free in return for my honest opinion—and I only endorse products and companies that I truly love and think you will, too. :)
So tell me: Have you ever reupholstered something? Small scale or large, I'd love to hear about your reupholster project. Tell me about it in the comments below.
Comments